Posts

Lab 6: Video Editing Using Sony Vegas Pro

Original Video Edited Video Conclusion At the end of this lab, i learnt about how to edit the video on Sony Vegas Pro. I know to use the basic function of Sony Vegas Pro. I know to edit the videos with style and it ease using Vegas Pro. Then, I know to edit the basic with adding text, background, audio and other media. After finished editing video, I know to rendering to take my video edit turn into a real video.

Lab 5: Blending Image Using Photoshop

Image
Object Image Background Image Texture Image \ Final Image After Blend Discussion At this lab, I discuss about how to bring in more picture in the Photoshop by click at View, go to Script and click to Load Files into Stack. I bring in 3 picture like background, texture and object picture to blend it. I zoom in all the picture and for object I changed layer  normal to multiply and adjust the opacity for object and texture picture to blend the photo and save in file JPEG. Conclusion End of this lab, I learnt about how to blending the image using Photoshop. So that i use 3 different photo which object, texture and background photo to multiple images as layers in Photoshop.

Lab 4: Mirror Image Editing

Image
Discussion: Image Before Editing  Image After Editing  Conclusion At the end of this lab, I able to explore the various tool in Photoshop such as holding Alt key on keyboard and double click directly on the name background layer to rename the background layer and Ctrl to select the image. This lab I learnt about to mirror effect of the image with using Photoshop by turning one side of the image into a mirror reflection of the other. From this lab i knew how to mirror the image by using my cat picture by following the method in this lab.

Lab 3 : Change background by using Photoshop

Image
Before Image Editing   Object New Background After Image Editing Final Image Conclusion :  At the end of this lab , I learn about how to change the background from an other image to others by using photoshop software. Also I know the tools in the Photoshop like Quick Selection Tool to remove the original background and w ith a hardish brush click and drag inside the area you want to select. Adobe  Photoshop  will try to guess which parts I want to include based on the contrast levels in the image. Then, i knew to fine-tune my selection zoom into the image and select and mask enables to refine the selection and convert it into a mask. I know to refine the selection by following the method and paste the new background into the image contain.

Tips Penjagaan Muka Yang Semua Wanita Wajib Tahu

Image
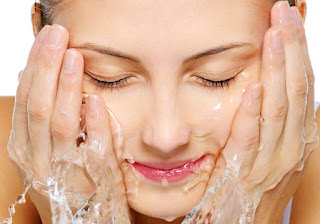
Cuci muka sekurang-kurangnya 2 kali sehari Mencuci muka adalah wajib sekiranya anda inginkan kulit muka yang cantik. Walau pun dihujung minggu anda cuma melepak di rumah, malas nak mandi dari pagi bawa ke malam, pastikan anda tetap mencuci muka. Mencuci muka yang kami maksudkan ialah mencuci dengan bersih menggunakan sabun pencuci muka. Bukannya cuci muka ala kadar, sekadar basuh dengan air macam P. Ramlee. Cuci muka dengan air suam, diikuti air sejuk Untuk mendapatkan kulit  yang cantik, basuh muka dengan air suam. Tujuannya untuk membuka pori-pori supaya kotoran yang melakat di dalam liang pori dapat dibersihkan semasa kita mencuci muka. Selepas selesai mencuci muka, semua buih dari pencuci muka sudah dibersihkan, bilas dengan air sejuk. Tujuan membilas dengan air sejuk ialah untuk menutup semula pori-pori yang terbuka Penyegar atau toner Selepas anda mencuci muka dengan bersih, dan dibilas dengan air sejuk, keringkan wajah dan jangan lupa untuk memakai toner atau